How to create a centered quilt label with standard sewing machine
How I create a centered quilt label with my Janome Sewing Machine

Below are the pictures of my centered label technique. In this case, I cut the fabric to the size desired before sewing out which I don't normally do because it is the outer pocket on the lap quilt for my Grandmother.
Three Stages:
The picture of 3 items shows the progression: Text document of the desired label text, scrap with Pellon SF101 to stitch out and get the length of each text line, and finally the label with the lines for centering text.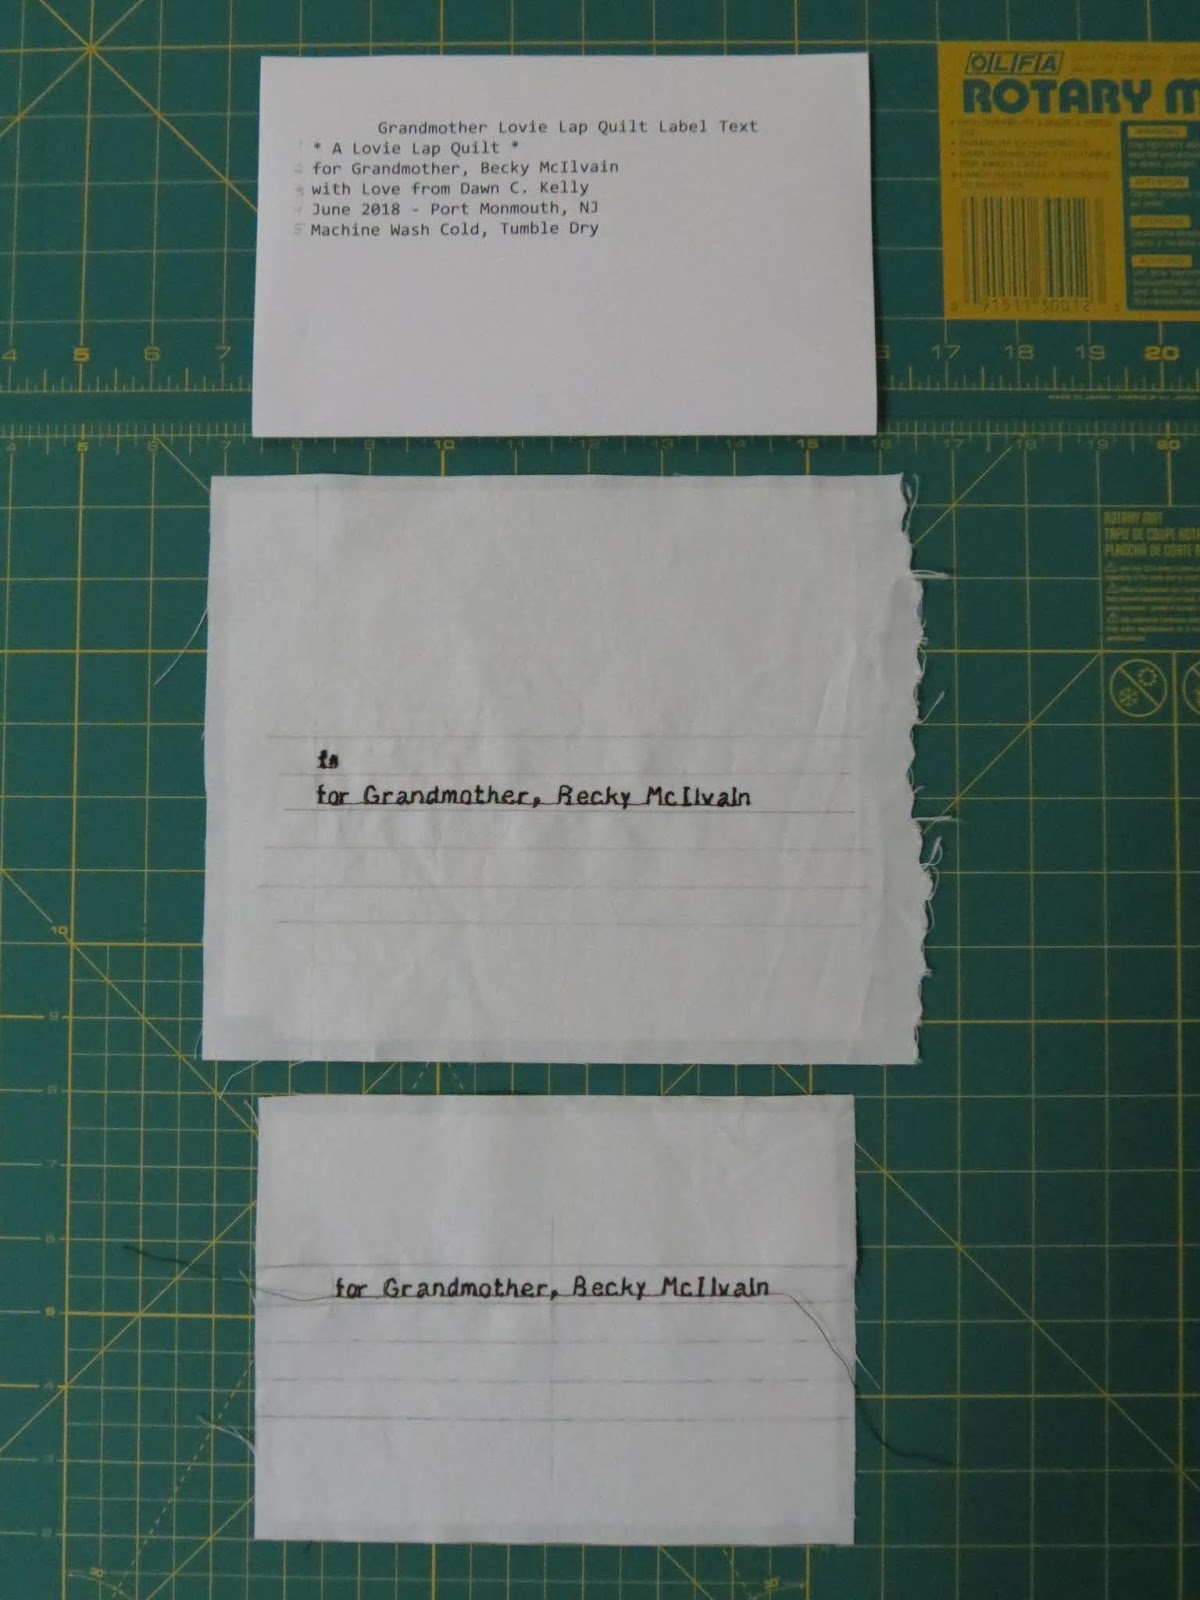
1) Determine text on computer & print out
2) Take scrap piece of same fabric (Kona white here) with same interfacing (Pellon SF101 here) for stitching out label text. Good thing too, because the threading was bad the first time so that blob was a false start. Usually, I draw an extra line or two to cover bad experiences like this one
3) Draw lines and follow instructions on other photo to get each text line centered horizontally
Stage 2 details:
Determining the horizontal line placement to center text on paper before drawing on the fabric (below the ruler). I love the BOHN fabric pencil, but I also use Chaco chalk marking tools as well (they just dust my machine more than I like)
Stage 3 details:
Steps to stitch centered text:

Stitching the centered text:
- Draw the center vertical line
- Draw the horizontal lines for sewing machine foot alignment, I use 0.5" because that looks good to my eye
- For each line of text:Enter the desired text in the sewing machine computer and (Stage 2) stitch the line of text on the scrap material
- Measure the text and determine the half width of the sewn line of text
- Draw the starting line on the label for this line of text
- Stitch on the label material and remove from machine, using a hand-sewing needle move top threads to the back, granny knot and trim threads to 1/4"
- Repeat 3-6 for each line of text
Finishing
Finishing the label is determined by how it will be used. Some options include:- Trimming all sides, making a folded hem and hand-sewing to the back of the quilt
- Trimming and hemming two sides and sewing to the back corner of the quilt with the binding initial application, align the raw edges of the quilt, label, and binding
- Trimming and hemming three sides, leaving the bottom edge raw and applying along the bottom edge of the quilt with the binding.
Examples for Hand-sewn separate from Binding Example:
 |
| Pinned in place before sewing |
 |
| Label not on the edges |


Comments
Post a Comment